I wanted to share these all natural way to keep your face healthy and clean!! I found this site thanks to a fellow blogger....www.crunchybetty.com. I will never go back to store bought face wash again!! :)
I have a VERY particular face and it reacts with almost EVERYTHING that I have tried to wash my face with until I found this!! I started off mixing the main ingredients with witch hazel, but switched to honey as I found it works better for my skin..I have very oily skin, but very dry in these winter months with the dry air...I alternate days between these two face wash options.. :) I use the Grape Seed oil as my carrier oil on the second one...
The first one :
No-Nonsense Daily Scrub for Any Skin Type
1K+
|
 |

Ground oats and almonds - all you really need.
Let’s talk about soap, and how you shouldn’t use it on your face.
Don’t use soap on your face.
Okay. Now that that’s out of the way, here’s something you SHOULD use on your face, and you can use it daily – or morning AND night, even. I use my scrub typically in the morning (nighttime is reserved for oil cleansing, heavy toner usage, or nothing at all when I’m lazy). This is going to be exfoliating, cleansing, and nourishing for your skin, which always seems like what the skin needs first thing in the morning.
The best thing about this is that it keeps for a reeeeeeeeaaaaaaally long time. They’re all dry ingredients, and kept in a closed container in a darkish place (like the medicine cabinet) this will keep for 6 months or longer.
This is an easy, no-frills and no-spoilage approach to food on your face.
Guess what else? The
winner of the drawing from the Gallery of Crunchy Betties is going to get a souped-up, super-powered version of this scrub, complete with neem powder (GREAT for any skin type), dried honey powder (see bottom) and MUCH more! That’s just one of the fun things that will be included in the giveaway package. You might notice that August is running out of steam here, and the deadline is soon to pass.
If you haven’t sent me pictures of food on your face yet,
GET TO IT QUICK! Remember, you don’t HAVE to blog it – just send me a pic to be entered in the drawing. If you DO blog it, let me know, because the first 10 (and we’re only at 7, ahem) still get something special soon.
First the basic recipe, which any skin type can use, or you can tailor it even more specifically to your needs, which we’ll touch on at the end.
No-Nonsense Daily Scrub Recipe
- 1/2 c. finely ground oats
- 1/2 c. finely ground almond meal
- Liquid of choice (water, witch hazel for oily skin, milk for dry skin, rosewater for any skin type) – this is added to the scrub on a single-serving basis, not in master recipe itself
Grind up your oats and almonds (separately is probably best, or the oats might stick to the almonds in processing) and mix together well. Add any of the ingredients below – or use as is.
To Use: Place a small amount, approximately 2 tsp, of scrub in your hand or a small dish. Add a bit of liquid (water, rosewater, witch hazel, or milk) to the scrub and combine well, letting the oats lightly soak in the liquid. Lightly scrub your face with the mixture, moving in an upward, circular fashion. Either let the scrub dry for a few minutes and lightly rinse with warm water, or rinse off immediately.
Finish with a toner and moisturizer, if desired.
Customize Your Scrub

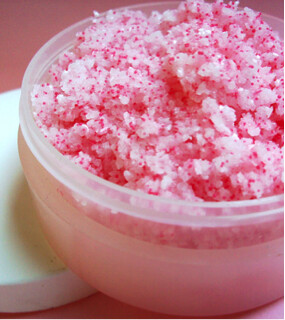
My scrub container and "dish" (a jar lid).
Here are some ideas to tailor your scrub to your exact skin type. Remember, you don’t have to add these – but they may help.
Oily Skin: 2 Tbsp. fine sea salt, 2 Tbsp. finely ground dried peppermint, and/or 5 drops rosemary essential oil.
Dry Skin: 2 Tbsp. powdered milk (try to find full-fat, if you can), 2 Tbsp. finely ground dried calendula, and/or 5 drops Roman chamomile essential oil.
And if you have very dry skin, you might find more benefit from using full-fat cream as the liquid you use to wet the scrub.
Combination Skin: 2 Tbsp. cornmeal, 2 Tbsp. finely ground dried chamomile, and/or 5 drops lavender essential oil.
.
.
If you want to get really crazy, one last thing I LOVE to add to my scrubs is honey powder. It’s exactly what it sounds like – powdered honey. We’ve been through the
skin benefits of honey here. And honey powder is no different.
I purchased mine at a local spice store, which I’ll give a shout out to here, since you can order their stuff online:
Savory Spice. But they’re not the only place you can find honey powder.
Add 1 Tbsp honey powder to your scrub recipe, iff’n you so choose.
Just Kidding on the Soap Thing
Okay. Not really. Soap really isn’t good for your skin – and squeaky clean is never what you want to aim for when you’re washing your face. You’re stripping vital oils that your skin needs to stay youthful and healthy, not to mention you’re leaving behind a residue that’s not particularly nourishing. And it does little to exfoliate – what’s actually best for your skin’s circulation.
It took me a long time to get used to the idea that I don’t need to cleanse to a shiny squeak to have healthy skin.
Which is funny, because throughout my life, I’ve always suffered more breakouts when I use a facial (soapy) cleanser. I just never put two and two together.
I tell you this as encouragement. I know it feels and seems weird not to use a cleanser or soap of some kind, but trust me – it’s just not necessary. One of myriad ways the cosmetics industry has you thinking you need to buy more products (which actually lead to skin conditions that make you think you need to buy even MORE products).
Can you break your soap habit?
This recipe should make it just a little easier for you.
In oaty-nutty-healthy-clean crunch!
Second one:
Nitty Gritty on the Oil Cleansing Method
6K+
|
|
There are facial cleansers – foamy, gel, soapy, dry. There are exfoliants and scrubs. Toners and splashes.
And then there’s oil.
The superhero of facial cleaning.
You heard me right. Oil.
Regardless of your particular skin situation (dry, oily, normal, reptilian), there’s an oil-cleansing method that will work with your type.
“Oil cleansing method,” is one of the most popular in-site search term on Crunchy Betty. You want to know more about this oddly effective way to wash your face. I don’t blame you. It’s disco awesome.
My one post on it, however, was written at nearly the absolute beginning of my blogging career. I had no idea how to craft a readable, coherent post. (Translation: It’s confusing and not very helpful.)
We’re going to try this again. The right way.
Everything you want to know about the oil cleansing method. Why it works. How to do it. The pros and cons.
Your mind = blown. Your face = gorgeous. Your undying love + candy = mine.
How Does the Oil Cleansing Method Work?
Turn off the faucet for a minute. Put your facial cleanser away. Instead, today, grab some oils and slather them on your face. Massage them around. Let them lounge luxuriously. Now, turn the faucet back on – very warm water. Dunk a washcloth in it and then slowly wipe the oil off your face.
Guess what? Your face is now as clean as it needs to be. It’s radiant. Gorgeous, dahling. You’ve just used the oil cleansing method.
But how does it work?
You know how your skin – all of it – secretes oil? Even if your face feels dry, it still has oil on it.
Well, according to chemistry know-how, like dissolves like. So, effectively what you’re doing is dissolving and wiping away all the icky dirty oil from your face and replenishing it with clean, nourishing oil.
There’s no harsh chemicals involved. No suds. Nothing to actually strip your skin of its oil.
And this is good, because when you strip your skin of its sebum, it goes into overdrive, trying to create more. Which leads to clogged pores. Blackheads. Whiteheads. Just plain old irritation.
(We learned this well with the
no ‘poo experiment, right? How shampoos make your scalp flip out and produce more oil?)
And that, in a very brief and succinct nutshell, is how the oil cleansing method works.
What Oils Are Best for Oil Cleansing?
Regardless of your skin type, there’s one oil you’ll probably want, and that is:
Castor oil.
Castor oil is gives you the most cleansing, dissolving bang for your buck. It’s also highly antibacterial in nature.
It can also be drying. So depending on your skin type, you’ll either use more or less castor oil proportionally to the other oils.
Good Oil Cleansing Varieties
- Jojoba (all skin types, but very desirable for acne-prone skin)
- Sweet almond (all skin types, especially oily)
- Grapeseed (all skin types, especially oily)
- Avocado (dry and aging skin)
- Sunflower Seed (all skin types)
- Olive (all skin types)
- Apricot Kernel (dry, aging, and normal skin)
- Argan (all skin types, especially aging skin … very pricey)
- Tamanu (all skin types … very pricey)
*You’ll probably want to stay away from coconut oil for oil cleansing, as it is a known comedogenic and may possibly clog your pores and exacerbate blackheads.
The Oil-Cleansing Ratio

Some oils to use for the oil-cleansing methods.
When you first start out with OCM, It’s best to think in ratios of thirds. You can measure these thirds out ahead of time and prepare a whole bottle full of oil. Or, you can do what I do and just eyeball it each time you use the method.
It might be better to use this on a “wash-by-wash” basis before you go mixing a whole bottle of oil together, just in case you want to change up the ratios if you notice your face is becoming too dry or too oily.
Here’s the rule of oil-cleansing thirds (remember, castor oil is important here):
.
.
- Oily skin: Use 2/3 castor oil to 1/3 carrier oil. (Or measure out 2 tsp castor oil and 1 tsp carrier oil.)
- Normal skin: Use equal parts castor oil and carrier oil. (Measuring out 1-1/2 tsp castor oil and 1-1/2 tsp carrier oil.)
- Dry skin: Use 1/3 castor oil and 2/3 carrier oil. (Again, 2 tsp carrier oil and 1 tsp castor oil.)
These ratios are NOT set in stone, but they’re a great jumping off point. Again, when I do this, I just eyeball it in the palm of my hand and go from there.
My favorite mix thus far: 1 tsp castor oil, 1 tsp avocado oil, and 1 tsp jojoba oil.
Oil Cleansing in 3 Easy Steps
- Prepare. Either mix your oils together ahead of time, or have the bottles ready. Set a clean washcloth beside the sink. Turn the hot water on to warm up.
- Cleanse. Starting with a dirty face (no need to pre-clean here, even if you’re wearing makeup), rinse your face lightly with the warm, running water. Pour the oil in the palm of your hand and then apply gently all over your face. Massage firmly, but gently, always moving upwards. Massage for 2 minutes, and then let the oil sit on your face for 30 more seconds or more.
- Rinse. By now, you should have very hot water coming out of your faucet. Adjust the heat until it’s cool enough to apply to your skin, but warm enough to soften the oil (it’s probably going to be hotter than the water you usually rinse your face with). Dunk the washcloth under the hot/warm water until it’s completely soaked. Apply the washcloth to your face and hold it there for 10-15 seconds. Slowly begin to wipe off. Rinse your washcloth and repeat until you’ve wiped all the oil off your skin.
That’s it!
Your skin is now cleansed.
For as easy as it sounds – and as beneficial as it is – there are some pros and cons to oil cleansing, though.
Pros and Cons of Oil Cleansing
Pros:
- It’s fantastic for your skin, and works for many people to clear up acne, combat dryness, and maintain a radiant glow.
- It’s super natural (be sure to buy cold-pressed or expeller-pressed organic oils, as well as castor oil that’s consciously extracted).
- It whisks away makeup in a flash. (It’s the only way I clean my face when I wear makeup now.)
- It doesn’t strip the skin of its natural oils.
- If you use this nightly, you may not need to spring for pricey moisturizers anymore.
Cons:
- It may take a week or two for your skin to adjust to this new regimen.
- It’s more time-consuming than just washing your face with a cleanser.
- It’s a little more costly than using a cleanser, depending on the oils you choose.
- It may mean more laundry, due to the numerous washcloths you’ll go through if you do this every night.
Notes on the Oil Cleansing Method
Now that you know why you should do it, how to do it, and whether or not you’re up to the challenge, you may have a couple of questions. If I don’t cover them here, feel free to ask down below.
The frequency at which you use the OCM is up to you. Some people do it every night. I don’t have that kind of hardcore dedication (nor do I feel like my face gets dirty enough most of the time to warrant it). The one thing I would probably steer clear of – completely – is switching up the OCM with a store-bought facial cleanser that contains sulfates or sulfides. You’ll just confuse the heck out of your skin and it won’t know what to do with its own oil.
You might not need to moisturize after you use the oil cleansing method. This is where I heartily encourage you to get to know your own skin, so you can tell if it’s feeling dry enough to use a moisturizer. Every time I’ve OCM’ed before bedtime, I’ve never felt the need to moisturize (save a little vitamin E oil around my eyes).
You CAN jazz it up with things like tea tree oil or lavender essential oil (if your face is oily or acne-prone) or carrot seed oil or rose hip oil for normal/dry skin or even some rose essential oil or myrrh essential oil if your skin is aging. In all cases, just use 2-3 drops of each oil in your mixture.
Don’t sweat it if you don’t enjoy the oil cleansing method. It does take some time, and it does take some time to get used to. Eventually, you may feel like you’re pampering your face in a whole new and incredible way. Or you may feel like you never want to go to bed, because. Only do it if you enjoy it – if you see and feel a difference you’re happy with.
Last but not least, here are some of the websites that turned me on to the oil-cleansing method last year. Thanks, ladies!